Filtering by Category: odrive tips

Get over 100GB of Free Storage! Dropbox, OneDrive, and More!

Added on by Tony Magliulo.

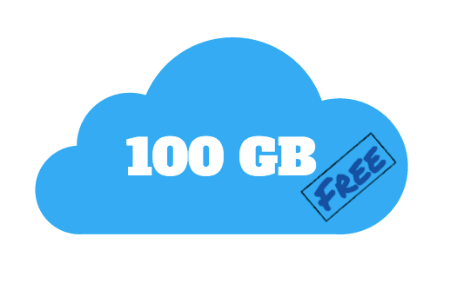
Want to get over 100GB of cloud storage, all in one place, for free? Read on.

Install odrive

It's free! With it you will be able to link all of the storage services below, and more, into a single folder. Get  full progressive sync, placeholder files, and advanced sharing capabilities for all of your storage. Did we mention it is also completely free? :)

Link it Up!

Linking to odrive is simple, and can be done from the web client or the desktop client.

From the web client:

  • Click on the “+” on the right side of the link listing and select the source you want to link.
  • Login to that source.

From the desktop client:

  • Select “Add link” from the odrive tray menu and select the source you want to link.
  • Login to that source.

odrive natively supports Dropbox, Amazon Cloud Drive, Box, OneDrive, Copy, and Google Drive (Facebook and Instagram too!). Linking one account in each of these services will get you a minimum of 62GB of free storage. Just sign-up and link:

But wait, there's more!

odrive is continually working on adding more native integrations, but our robust WebDAV capability already allows linking several other services. With it, you can easily add another 40GB to your odrive, netting you over 100GB of free cloud storage! Again, you only need to sign-up for the service and then link it into odrive.

To link these services you can follow the same instructions detailed in Step Two above, but select “WebDAV” as the source. Enter the WebDAV URL and your login information to link it up.

*These services have all been tested for basic functionality in odrive, but please use them at your own discretion

There you have it. 102GB of cloud storage, all in one folder, for free!

Do you have any tips or tricks to get even more free storage with odrive? Let us know in the comments.


Your files, your way: See what you want. Sync what you need.

Added on by Tony Magliulo.

The attraction to cloud storage is undeniable. A near-infinite resource at our fingertips to store the mountains of personal and professional data that we humans have become extremely adept at creating. As users gleefully rush headlong into the cloud storage era, pushing up anything and everything they can, new challenges are being encountered. How can the vast cloud be effectively utilized within the finite medium of a local computer?

File Virtualization with sync

File Virtualization is the method of representing a file system structure without needing to have everything exist locally on your computer. When you add sync to the equation this solution becomes a compelling means of working with structures that cannot exist locally. Browse everything, but have nothing cached locally until you need it.  Microsoft’s changes to OneDrive on Windows 8.1 showed users the power of this type of solution, until they took it away in Windows 10 … :(

File Virtualization with sync is extremely useful, but it is a solution that will start to break down at scale. Tracking changes across a vast structure, even without local caching, can render this solution unusable or so delayed and out of sync that its utility is severely reduced. As your dataset expands, the percentage of data that you actually need to focus on shrinks. Why spend cycles monitoring and tracking storage structures that you don’t care about, especially when there is a good chance that nothing is happening there?

Progressive Sync

Progressive Sync is the evolution of file virtualization. The premise behind progressive sync is that you do not need to have visibility into every nook and cranny of your storage at all times. Instead, you need visibility into specific areas of your data. These areas can change dynamically, depending on your immediate need, so on-demand collapsing and expanding of the visible structure needs to be available.

Not using progressive sync is a bit like trying to engage in conversation with your best friend by talking to everyone you know, simultaneously. It is going to be very slow, utterly confusing, and ultimately result in a big a waste of time and energy. Focusing on that single conversation with your best friend removes the confusion and irrelevant information and allows you to prioritize for the task at hand. Communication is quick, precise, and meaningful. This is what progressive sync does for you and your files. Engage (sync folder), discuss (sync files), disengage (unsync folder), repeat.

Progressive sync is the only solution available that can allow you to efficiently use near-infinite cloud storage within the constraints imposed by today’s devices.

Sync, the way you need it.

odrive offers progressive sync for all of your storage. You choose what you need to see. You choose what you want to sync. The ability to effectively map the vastness of cloud storage to your tiny local device is available to every odrive user, for free.

When you first start using odrive you will see all of the storage you have linked available as .cloudfx stubs in the root of your odrive folder. A double-click will expand that folder, browse you into it, and sync all the the files at that level according to global auto download limit you have set.

Simply browse through the file system to expose the directories you want to see. Tweak the auto download limit to fine tune what you need synced. Utilize the “sync all” feature to bring into view an entire directory structure. Use “unsync” to collapse a specified structure, removing it from view and allowing you to focus on your next priority.

Using all of these features together gives you ultimate flexibility for utilizing and managing your storage. See what you want and sync what you need with odrive.

To read more about odrive sync:

https://medium.odrive.com/sync-differently-b993694e1544#.y8823rsvw

https://medium.odrive.com/unsync-is-the-missing-link-to-cloud-storage-539493c384c1#.egwnn2gpq

Get OneDrive placeholder files on Windows 10 & OSX

Added on by Tony Magliulo.

Windows 10 was released last week and the general consensus is that Microsoft managed to get a lot of things right, blending the better parts of Windows 7 and 8 into a worthy successor. Even though Windows 10 is better than its predecessors in many ways, a staggering number of users have noted the significant step backwards with OneDrive functionality.

Windows 8.x introduced a much lauded feature for OneDrive users with “placeholder” or “smart” files. This feature allowed OneDrive users to visualize all of their OneDrive files without needing them to be physically cached on the system. Unfortunately for loyal OneDrive users, this feature has been taken away in Windows 10.

We have the solution you need

If you are reading this, chances are good that you are one of the unfortunate Windows 10 users that has been impacted by this change (or an OS X user that has been left out in the cold since the beginning). The good news is that odrive has you covered. One of the core features of odrive is the ability to virtualize your files.

Progressive sync

From the start, odrive has employed what is called “progressive sync”. This is the ability to instantly choose what you want to sync locally, at both the folder and file level. With odrive you get the flexibility and control you need, with all of your files.


How it works

odrive has a powerful, always-on sync engine at its core. If any local file system modifications or additions are detected, odrive will automatically and instantly begin syncing those changes to your OneDrive account. This same sync engine is what allows odrive to represent both files and folders, virtually, as “stub” files on your local system.

To ensure that you always know what is virtual and what isn’t, odrive distinguishes between virtual and physical files in a number of ways.

  • Cloud files and folders are given unique icons to set them apart from cached files and expanded folders
  • Locally cached files are given a checkmark overlay to indicate that they are in sync and physically available on the local file system.
  • A cloud file carries the extension .cloudx
  • A cloud folder carries the extension of .cloudfx.
 
howvirtualfolderswork.png
 

With odrive, interaction with virtualized files and folders is extremely intuitive. A simple double-click or right-click sync action will expand cloud folders or locally cache cloud files. Decide in-line and on-the-fly what you need, instead of being forced to preemptively choose what you want synced from a separate, cumbersome UI. With the option to set an automatic download threshold and the ability to recursively sync the folder structures of your choice, odrive gives you the power and flexibility you are looking for, for all of your storage.

A few examples of the control you will gain with odrive's progressive sync:

  • Do you want to see all of the files and folders available but have no files cached? No problem. Set the auto-download limit to “never download” and right-click “sync all” on your OneDrive folder.
  • Do you want to only cache one file out of thousands to focus your efforts? You can with odrive. Just drill directly to the file you need and sync it.
  • Do you need to save some space on that tiny laptop SSD? It is easy with odrive. A right-click “unsync” action is all that it takes to free up that valuable space.

All of your bases are covered

With odrive, the “placeholder” functionality that users fell in love with in Windows 8.x is available in Windows 10…. and Windows 7, and OS X. Not only is progressive sync available for OneDrive, but it is also available for all of your other storage. Dropbox, Box, Google Drive, Amazon Cloud Drive, file servers, you name it, odrive has you covered, for free.

To read more about odrive sync:

https://medium.odrive.com/sync-differently-b993694e1544#.y8823rsvw

https://medium.odrive.com/unsync-is-the-missing-link-to-cloud-storage-539493c384c1#.egwnn2gpq

Tips & Tricks for Using odrive

Added on by Aric Johnson.

Did you know that there are a ton of cool things you can do with odrive that you may not have known about? Well, here are some tips and tricks to better utilize odrive, so you can be the envy of all your friends!

1. Download hashtags from Instagram

Have a hashtag on Instagram that you created or are just obsessed with? Instantly get all of those photos by right-clicking and selecting “Add Hashtag Folder” within your Instagram folder on odrive.

To give you a better experience, we sync 100 photos at a time for you. If you want to see more than that, just open up the “More Posts” folder to sync the next 100 photos.

(Please note that we have recently updated odrive and have temporarily disabled our hashtag feature. We will be adding it back in as soon as possible though!)

To get photos from a hashtag on Instagram, right-click and select "Add Hashtag Folder" from the odrive menu.

To get photos from a hashtag on Instagram, right-click and select "Add Hashtag Folder" from the odrive menu.

To read more about how odrive makes Instagram more useful:

https://medium.odrive.com/instagram-is-more-than-just-a-pretty-face-b98b07534413#.85kywvwa6

2. Share files and folders from Dropbox

If you’d like to share one of your Dropbox files or folders, just right-click what you’d like to share and select “Share” from the odrive menu. A Dropbox share link will be copied to your clipboard, so you have the freedom to share them wherever you’d like.

3. View Gmail attachments in their original email

As mentioned in one of our Gmail blogs, having an email attachment without any context can be a challenge at times to understand. With odrive, you can right-click an attachment and select “Open In Gmail” from the odrive menu. Your original email message containing the attachment within Gmail will automatically open for you. 

(Our "Open in Gmail" feature has also been temporarily disabled.   We'll be adding it back in as soon as possible!)

To get more context into a Gmail attachment, right-click and select "Open in Gmail" from the odrive menu.

To get more context into a Gmail attachment, right-click and select "Open in Gmail" from the odrive menu.

To read more about how odrive improves your workflow with Gmail: https://medium.odrive.com/email-is-dead-long-live-email-a5f2393c1319#.4s7z92wrb

4. Open files directly in Dropbox, Google Drive, Box, and OneDrive

If you need to manage or edit your files directly in the Dropbox, Google Drive, Box, or OneDrive web client, you can do so by right-clicking a file and selecting “Open in…” from the odrive menu.

(Our recent update to odrive has temporarily disabled this feature as well. Don't worry though, it'll be back!)

5. Sync or unsync your files and folders all at once

Working with a lot of files and want to do a lot of stuff quickly? odrive lets you highlight everything you want and select “Sync” or “Unsync” from the right-click odrive menu to get what you need done faster.

To read more about odrive sync:

https://medium.odrive.com/sync-differently-b993694e1544#.6ovb5b5o6

https://medium.odrive.com/unsync-is-the-missing-link-to-cloud-storage-539493c384c1#.xkdslseo0

6. See the amount of data processing on odrive

By clicking on the the odrive tray menu, you can see the exact amount of data processing at that time from each app.

Click on the odrive icon in your tray menu and see the exact amount of data processing.

Click on the odrive icon in your tray menu and see the exact amount of data processing.

7. Add multiple accounts from the same app

Have more than one Dropbox or Google Drive account? You can easily add all of your accounts by going to the odrive tray menu and selecting “Add Link”. For Dropbox, be sure to log out of your account on your web browser and login again with your second account’s credentials, so you don’t link the same account twice.

8. Rename folders the way you want to

No matter which application or storage you have linked to, you can easily rename folders to keep your existing organizational structure or create one that works for you.

9. Remove your apps & storage from odrive

If you ever want to remove your stuff from a specific app or storage, just right-click and select “Unlink” from the odrive menu. Your files will be removed from your computer, but remain safely stored in your app or storage.

unlink.png

10. Share your tips on how you use odrive on our forum

Do you have other tips on how you use odrive? Have questions or want to give us feedback? You can always reach out to us on our forum!

Now that you’re about to become a big deal knowing all of these odrive tips and tricks, it’s time to go spread the word and impress others with your knowledge! Happy syncing! :)

- Michelle